

User Management Guide
Learn how to add, remove, and manage users on your Corporate or Nursery / Supplier account, step by step.
-
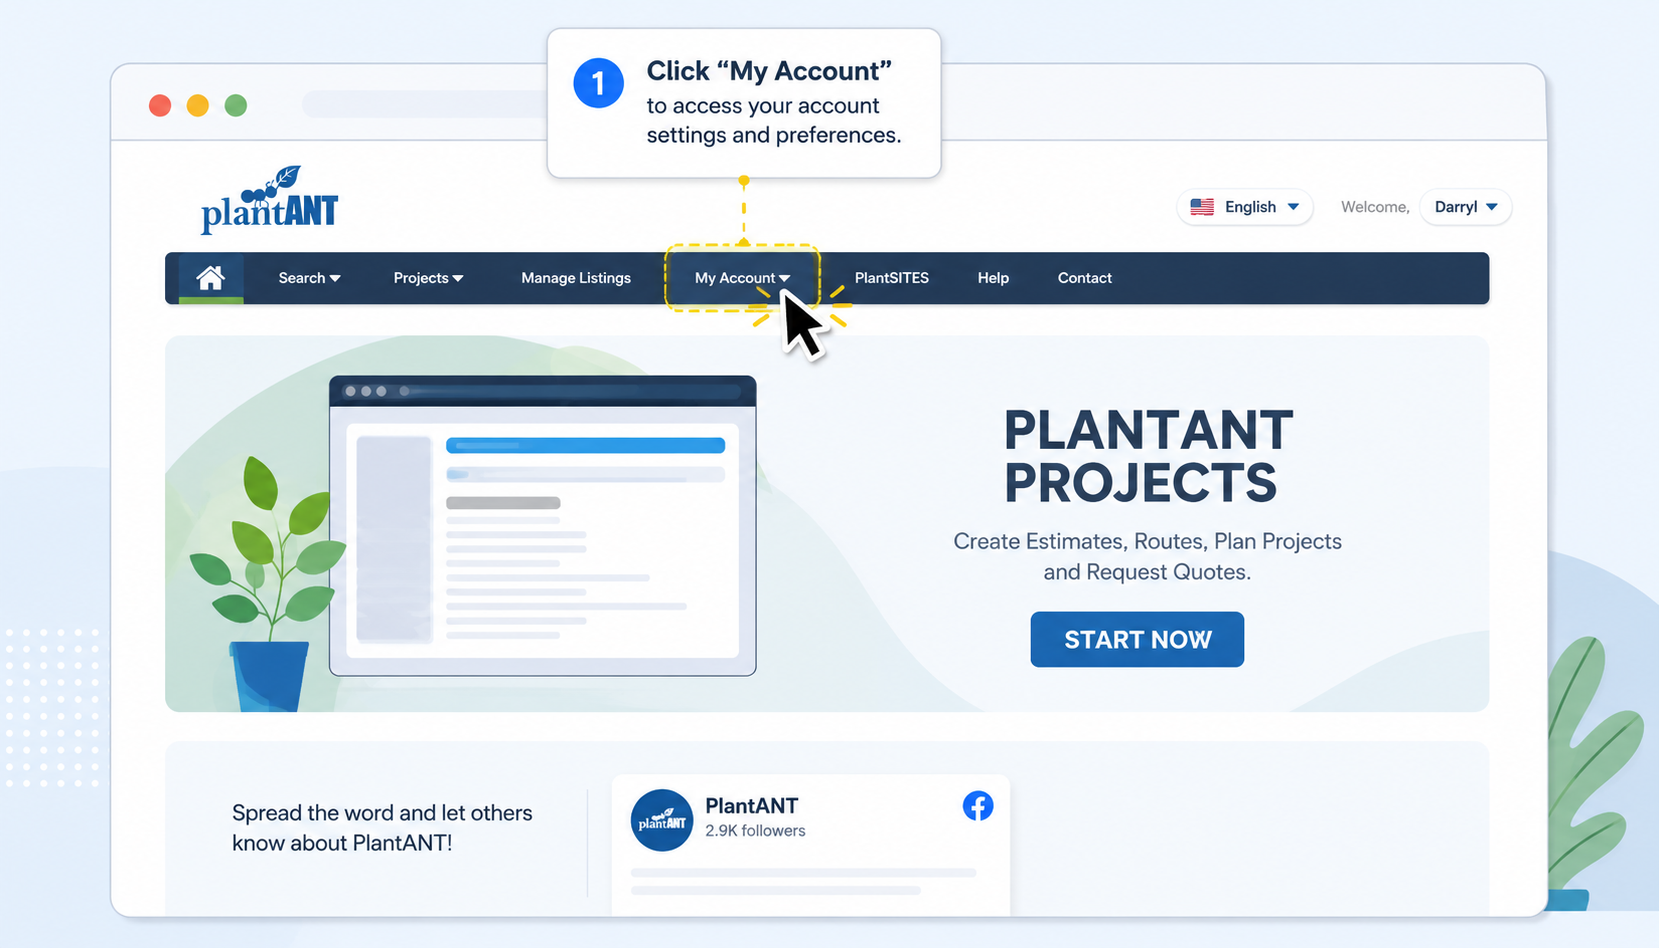
Access My Account
Log in to your PlantANT account. From the main top navigation menu, click on My Account to access your account settings and preferences.
-
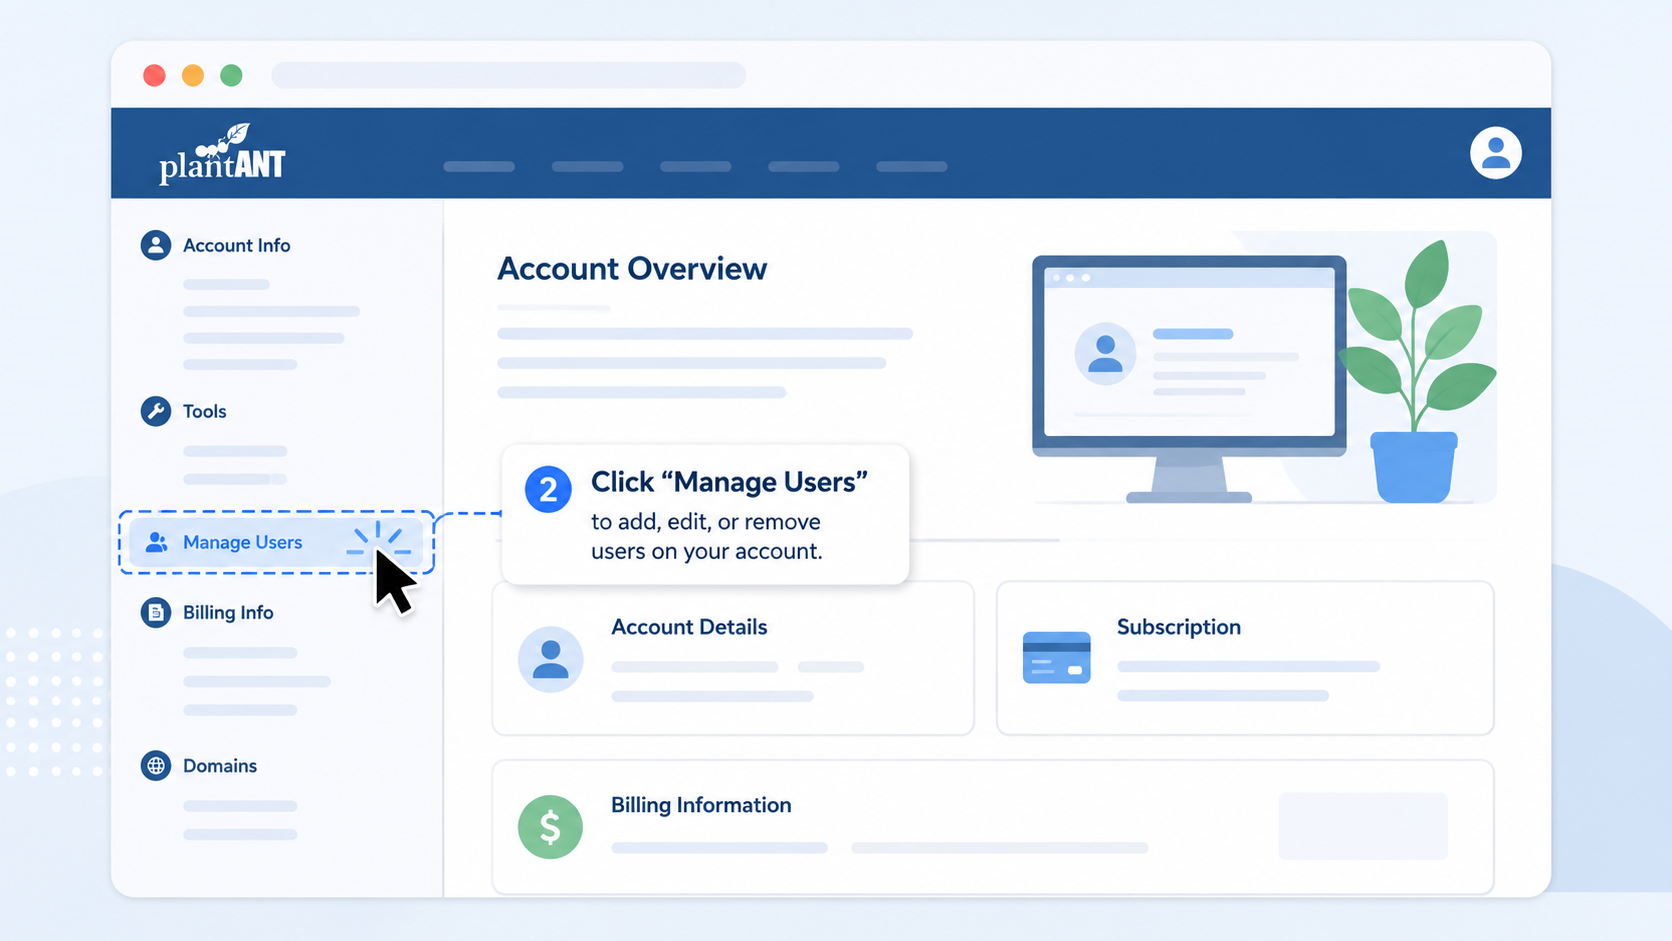
Open Manage Users
In the left-hand sidebar under the Account Info section, click on Manage Users to add, edit, or remove users on your account.
-
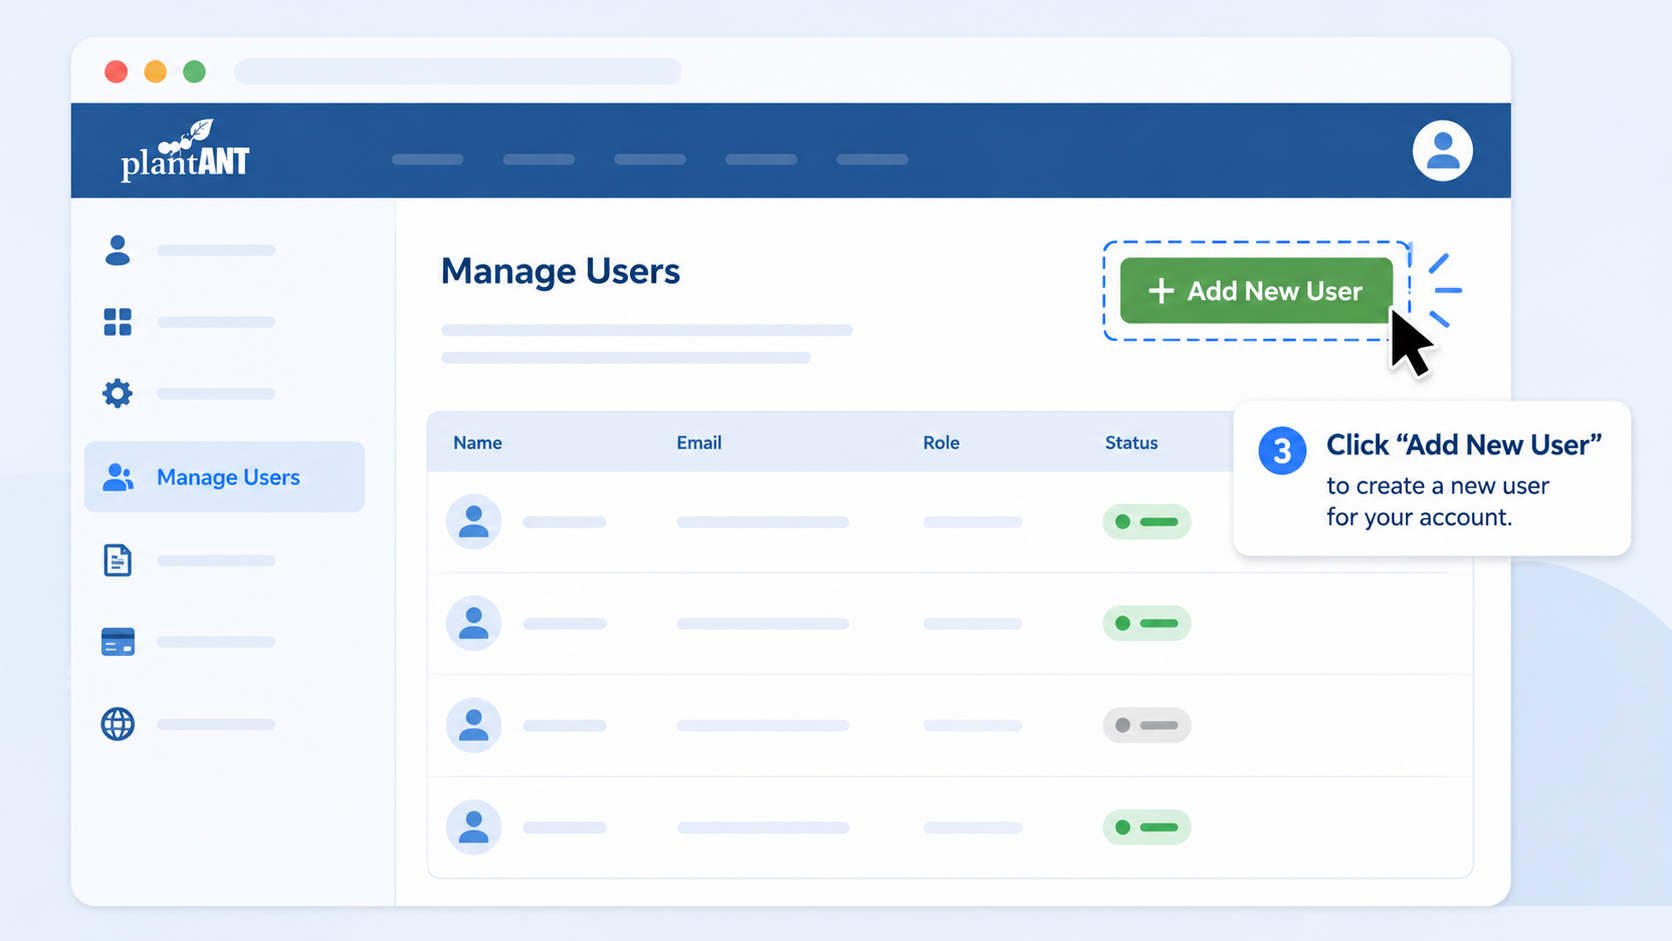
Click Add New User
On the Manage Users dashboard, click the green + Add New User button located in the top right corner to begin inviting a new user.
-
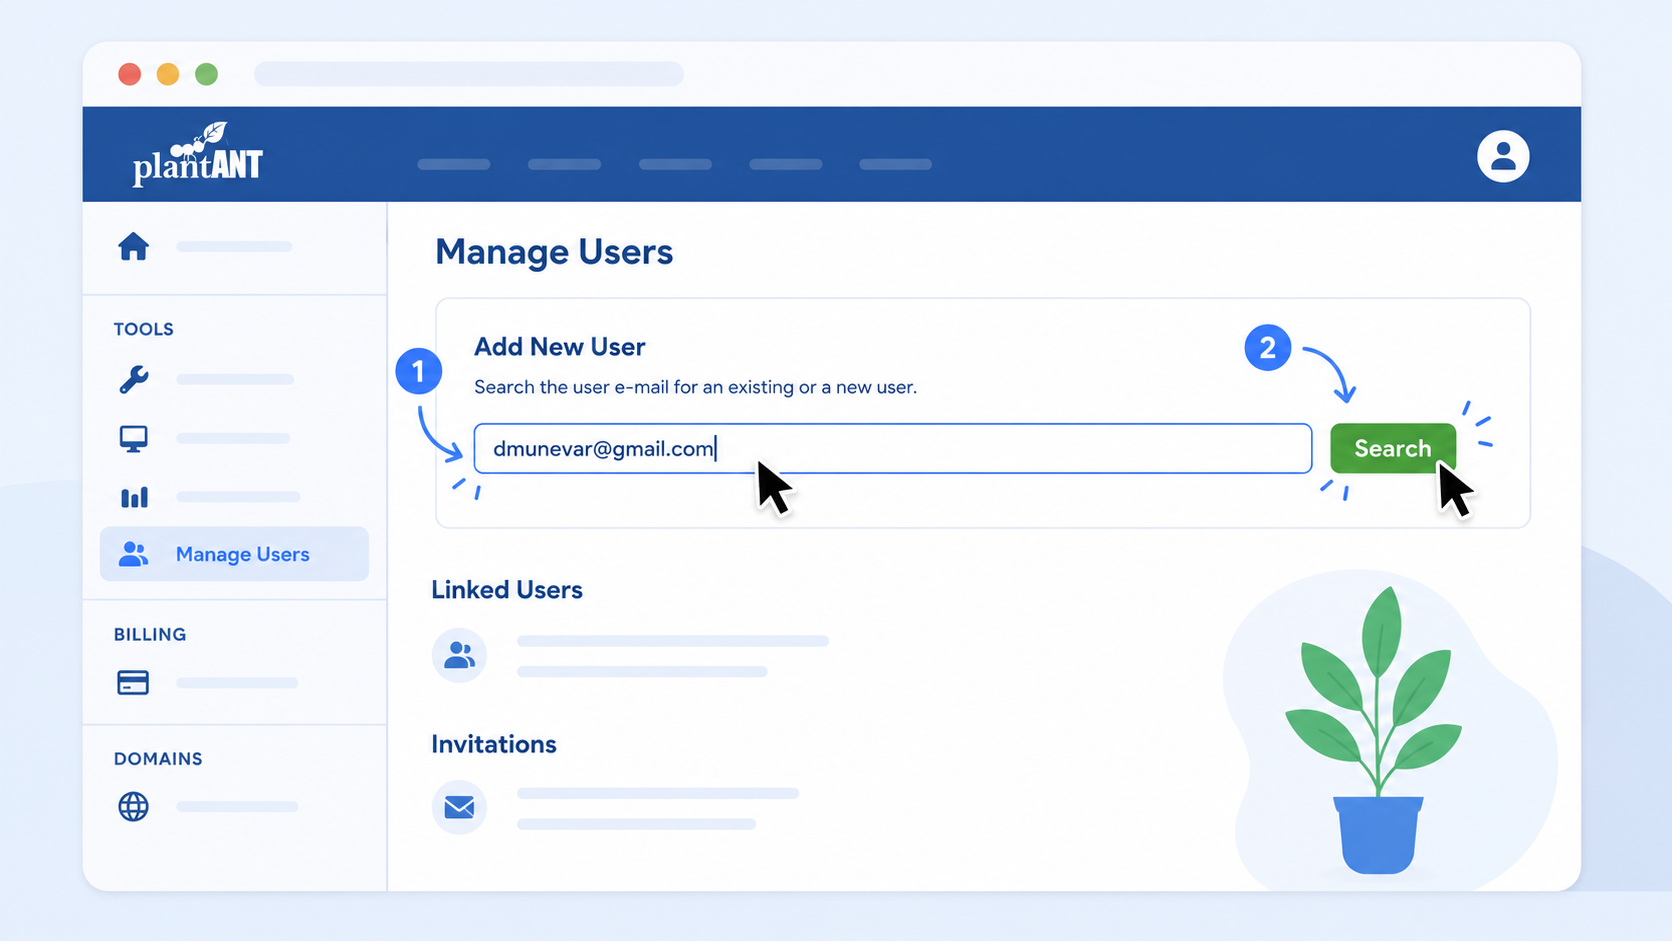
Search by email
An Add New User section will appear. Type the email address of the user you want to invite into the text field and click Search. The system will check whether that person already has a PlantANT account.
-
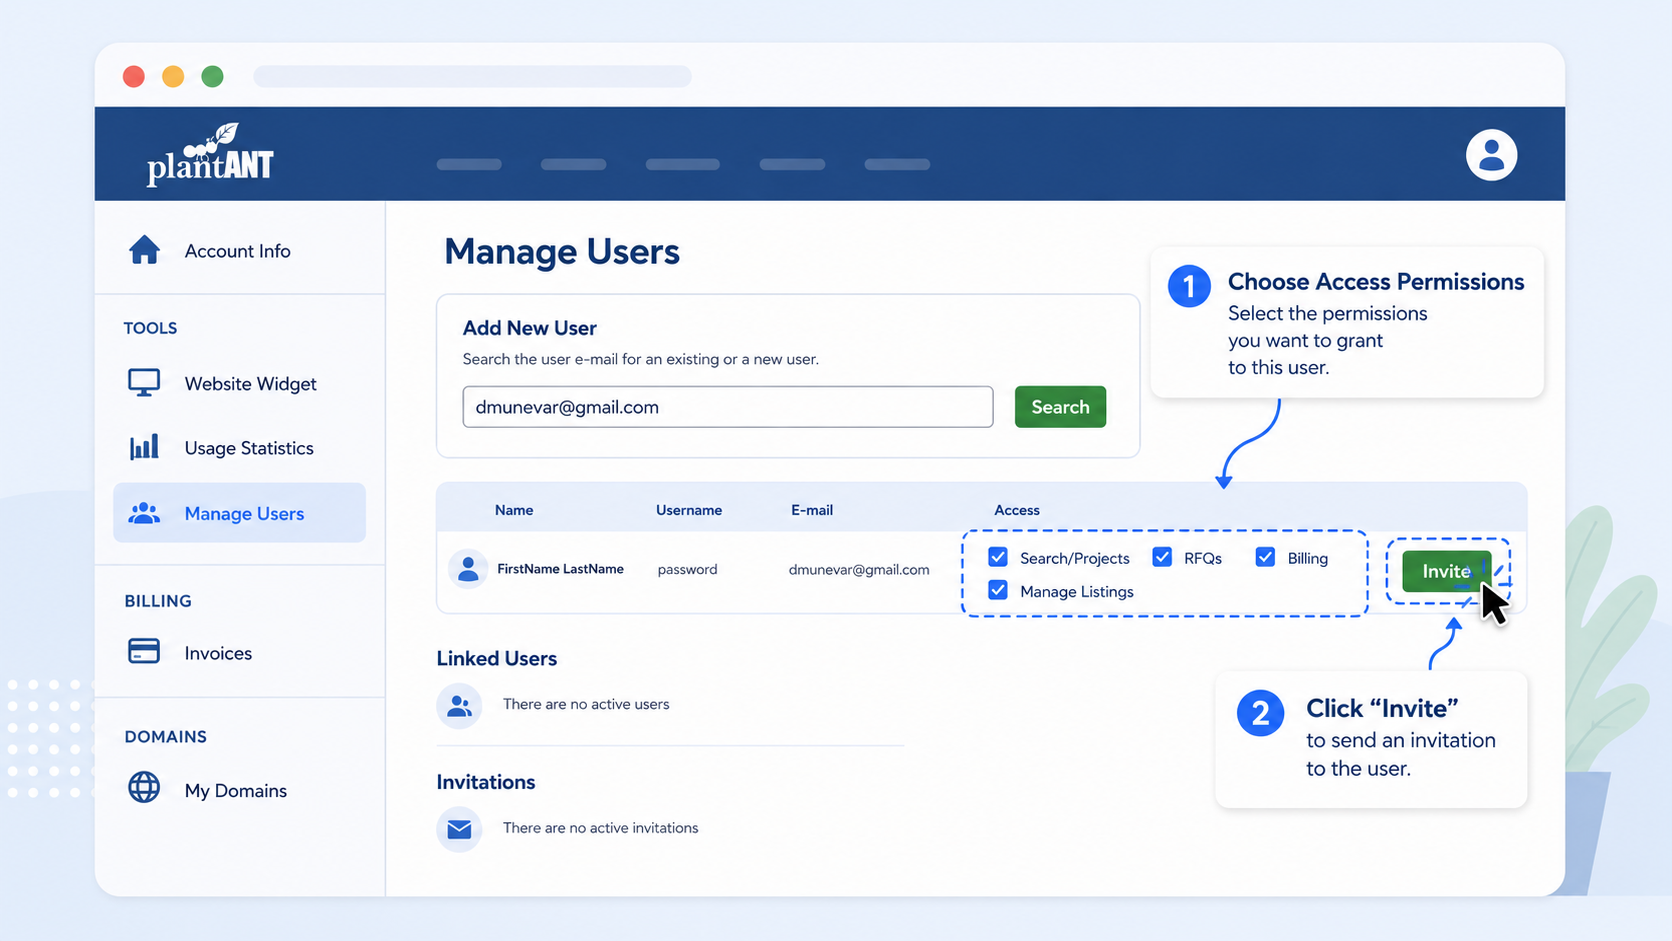
Set permissions & invite
Once the email is found, the user's details will appear with a list of checkable access permissions: Search/Projects, RFQs, Billing, and Manage Listings. Select the access you want to grant and click Invite.
Only users with Plant Search permission will be billable. Users without Plant Search permissions are free. -
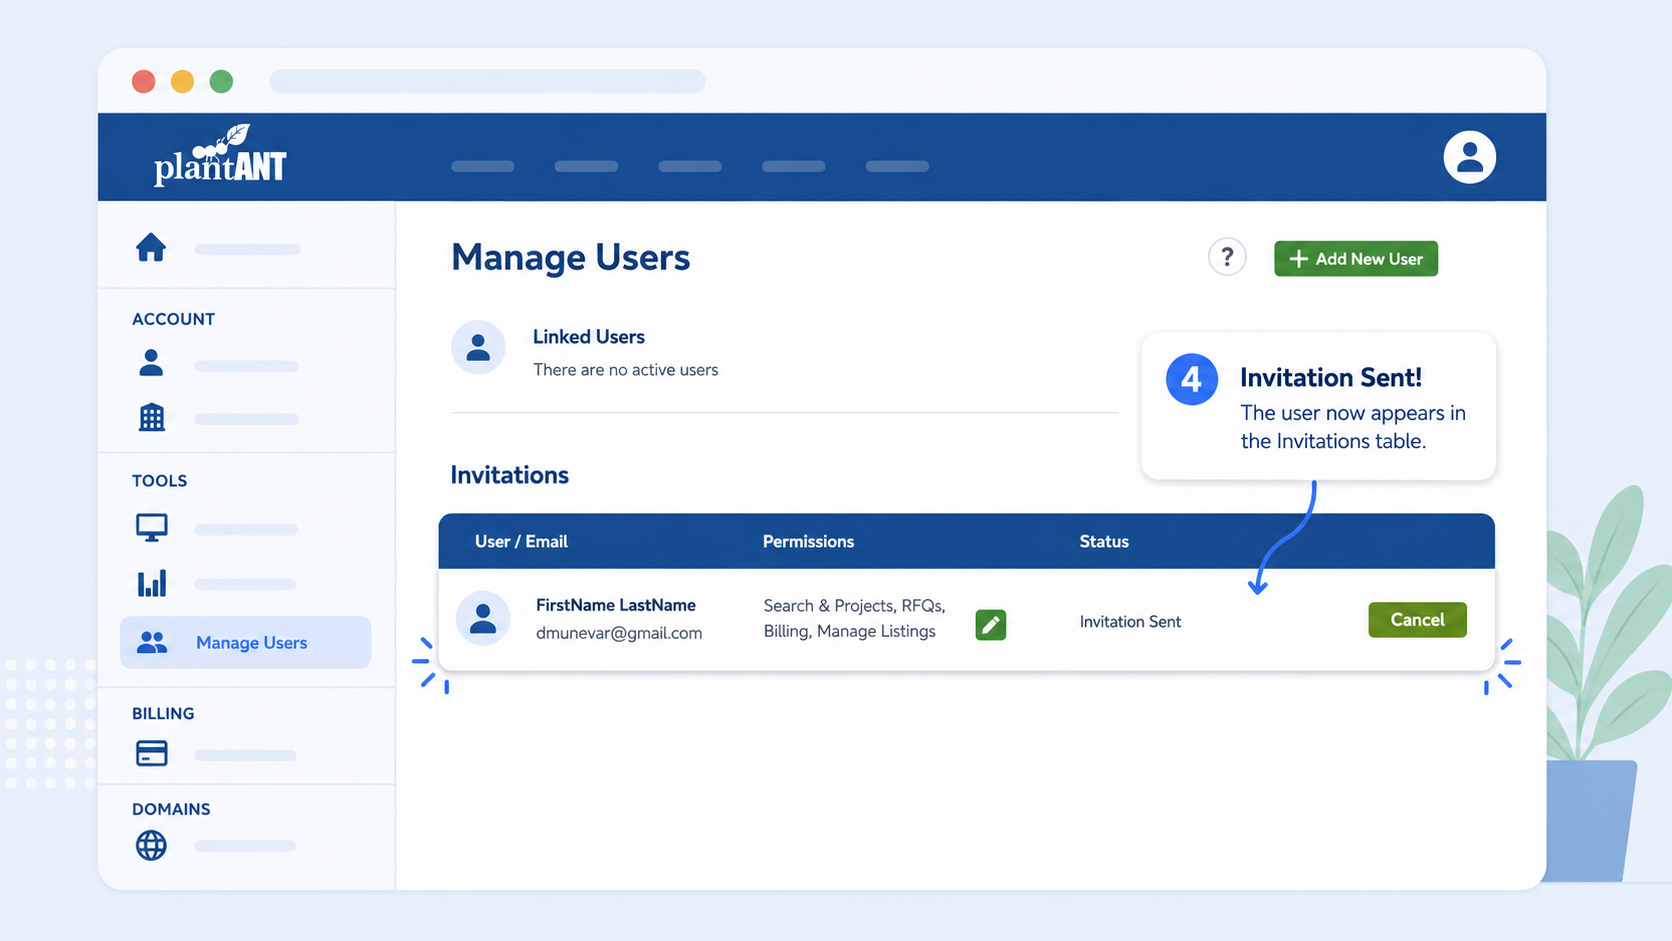
Invitation sent
The system will send an invitation email, and the user will appear under the Invitations list with the status "Invitation Sent". You can cancel the invitation from here if needed.
-
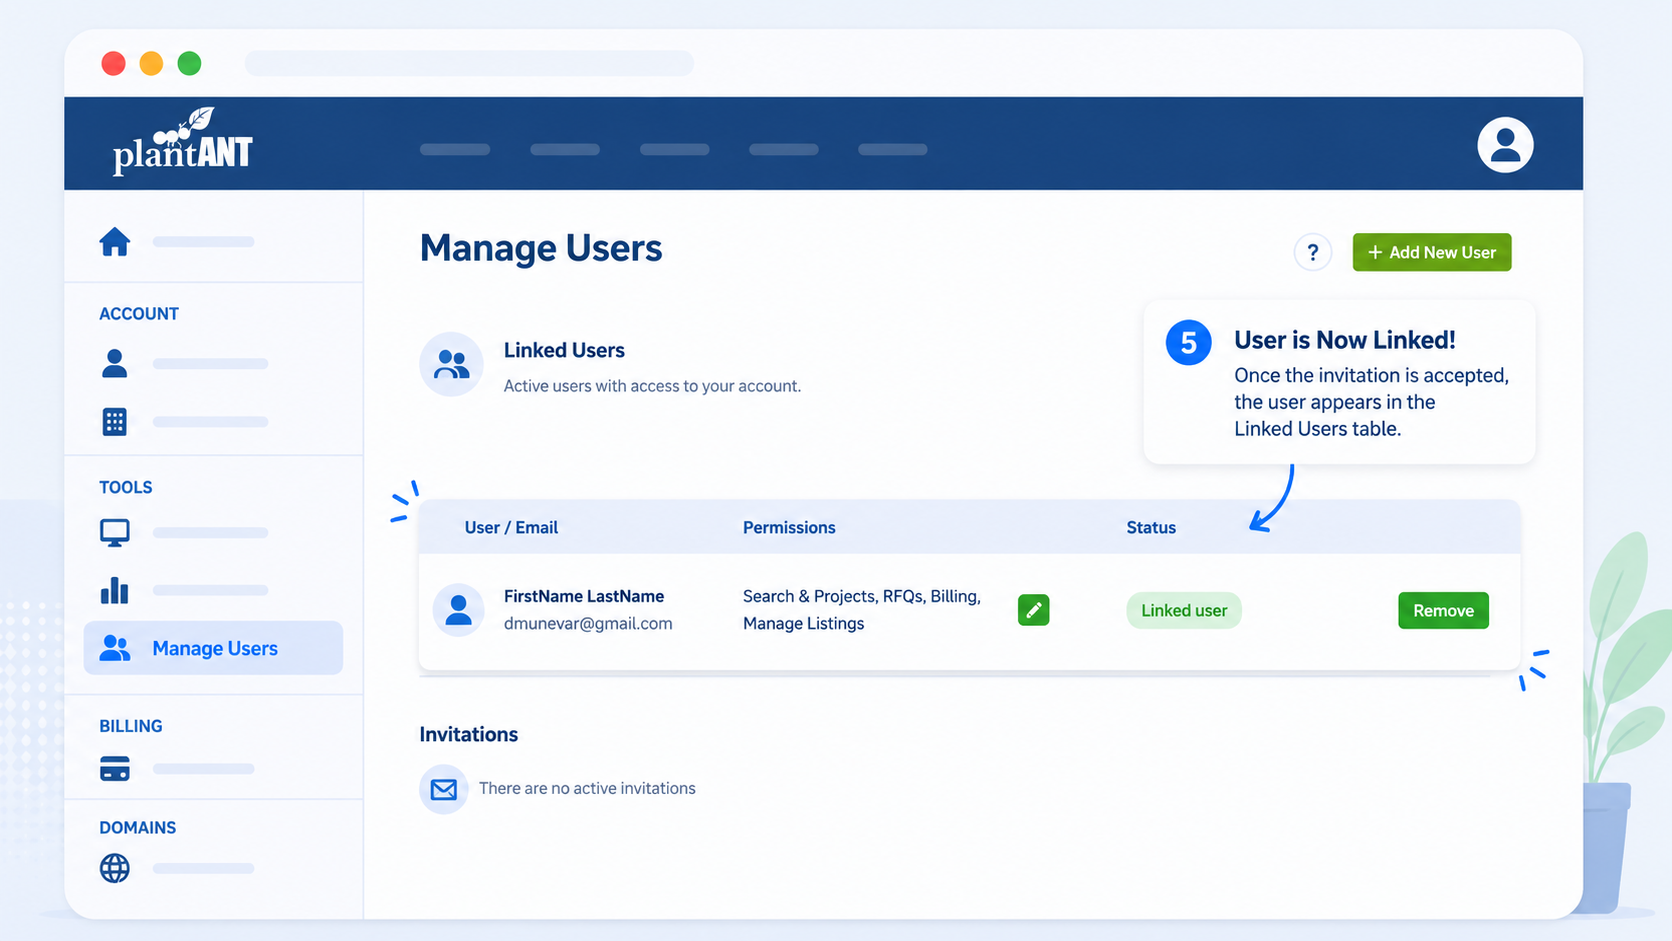
User is now linked
Once the user accepts the invitation, they will automatically move to the Linked Users table. You can remove their access at any time by clicking the Remove button.
-
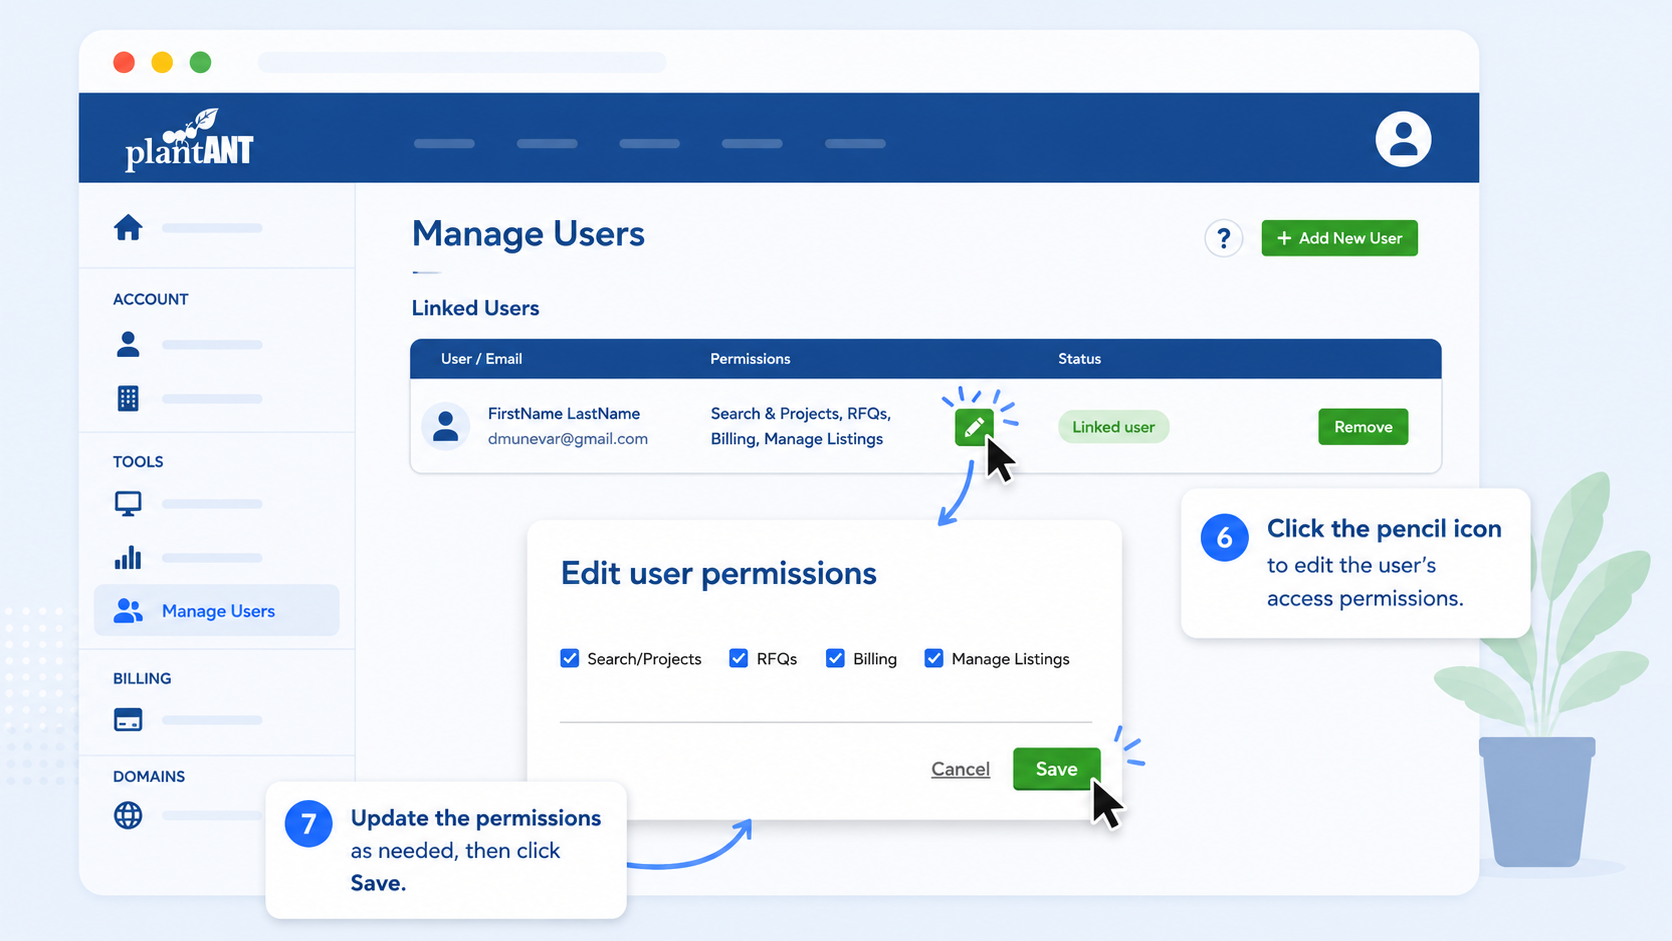
Edit user permissions
You can modify an existing user's permissions at any time. Click the pencil icon next to their listed permissions to open the Edit user permissions dialog. Adjust the checkboxes and click Save to apply the changes.